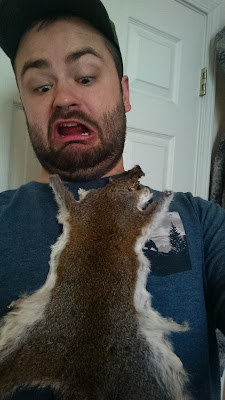
Tanning Furs...First Try!
 |
| Revenge of the Tanned Squirrel |
Many people have opinions about fur and whether or not we should pursue furbearers. In a future post I might go more into detail on the ethics of trapping, but here I'm assuming you've caught a critter and plan on using it to its fullest. That means tanning the hide! There are a thousand ways of tanning, but I hope to offer simple, effective method that anyone can do. DISCLAIMER: I am not nor do I claim to be a professional fur handler. Please consult other sources as well as what I have here. Much of what I have done is based off research I've done on Youtube and other trapping websites.
Define Tanning: Tanning is the process in which the natural oils, which rot, are taken from a skin and replaced with preservatives of some sort. Originally this comes from the use of tannic acid to preserve the skin, though other chemicals can be used.
What you need: This will work for a few small furs or one large fur, like a beaver pelt.
1. One 5 gallon bucket ($3-5)
2. A few pounds of non-iodized salt ($3-5)
3. A fleshing board (Homemade $10)
4. A fleshing knife ($20-30) https://amzn.to/2pZ407g
5. A second smaller, plastic container with holes in it. I used an old ice cream bucket
6. something to knock the salt off with (back of an old knife)
7. deer hunter's hide tanning formula: orange bottle ($10-20) https://amzn.to/2NLV7rp
8. sandpaper ($3-5)
9. dish soap ($3-5)
So, in total you're looking at about $50-75 to get set up tanning. I highly recommend that you do this in steps. You can always freeze hides and slowly get the supplies you need. One thing to definitely not skimp on, however, is a fleshing knife. I did the squirrel pelts in this video with a hatchet and it was a pain in the butt! Also, start with the pelts you care the least about. For me, that's my squirrel pelts. I wanted to experiment with them so I didn't ruin my beaver pelt by making a rookie mistake.
Total time: 3-5 days for small hides 7-10 days for larger ones
Step One: Flesh the hides. This means removing extra fat, meat, and membrane from the hides. This is very difficult without a fleshing knife. Be careful not to rub holes into your hides.
 |
| My homemade fleshing board |
 |
| hides ready to salt |
Step Two: Salt the hides. You want to cover the hides in a generous amount of salt. Non-iodized salt only!! Get it in all the crevices. Then, fold the hides skin on skin so the fur is showing. Take your plastic container and put the fur in it. Put that on a piece of wood or something to keep it elevated in the bottom of your 5 gallon barrel. This will let any moisture drain from the hide into the bottom of the bucket.
 |
| salted hides |
Let it sit for 24 hours.
Step Three: Unfold hides and knock off the old salt. Re-salt and repeat step two. Let it sit for 24 hours.
Step Four: Prepare a salt bath using 1/2 pound of salt for every gallon of water. Use warm water to dissolve salt, but let it cool before putting the hides in. Submerge hides in water (skin out if skinned in a tube form). Let sit for 6-8 hours.
 |
| hides in salt bath |
Step Five: Remove hides from salt bath and squeeze out water.
At this point, the directions on the tanning formula say to thin the hides. You can do that with sandpaper or a wire wheel if you let the hide almost dry. I also did this out of order and my hide turned out pretty stiff, even after extensive breaking. Next time, I will try thinning the skin at this point instead of later.
Make a soap bath with dish soap and water. The proportions are less important here. Submerge the furs and squeeze out the soapy water. You may need more than one bath for greasier furs like raccoon or beaver. This removes the oils from the hair and skin.
Step Six: Hang the hides to drain. Let them get almost dry. They should stay moist and pliable. If they get crinkly, add a bit of water to them until they're at the right moisture level. You want them to be able to soak up the tanning formula, but not be too wet.
 |
| hides after salt bath and soap bath. Notice how white the skin turned. The preservation is working! |
Step Eight: Let it slowly dry over the next few days, periodically stretching and breaking it. I made the mistake of expediting this and I ended up with a crinkly hide instead of a supple one. Take the time and let it dry gradually. Stretching the skin at this point will help you get that leather texture. You can further thin it with sandpaper after tanning is finished as well. Just don't thin it too much.
 |
| I think this is where I made my mistake. I tacked them up and fast dried them with a heater. |
 |
| One of my hides had some slippage. My other one turned out fine so I'm not entirely sure why this one rubbed off. |
Now you can make some sick mittens, a hat, a new collar for your jacket, or whatever. Maybe you just want it as a throw or a wall mount. Hopefully this was helpful. Feel free to comment on what works for you! I'm still learning.


Comments
Post a Comment